ChartMill Stock Screener Update 2023-04-12
Last update: Apr 13, 2023
Custom views capabilities expanded
Custom views allow you to view the results of your screens the way you want. This possibility has existed for some time, but recently this feature has been revamped, making the creation of a custom view much easier!
If you are not sure what we mean by views and custom views, definitely watch this video first. Just keep in mind that the part from 08:49 onwards no longer applies after the update as mentioned in this article. A new video will follow.
The new update makes the selected sections immediately visible while creating the view. Moreover, you can move the created sections and even individual parts within a section via a drag-and-drop function.
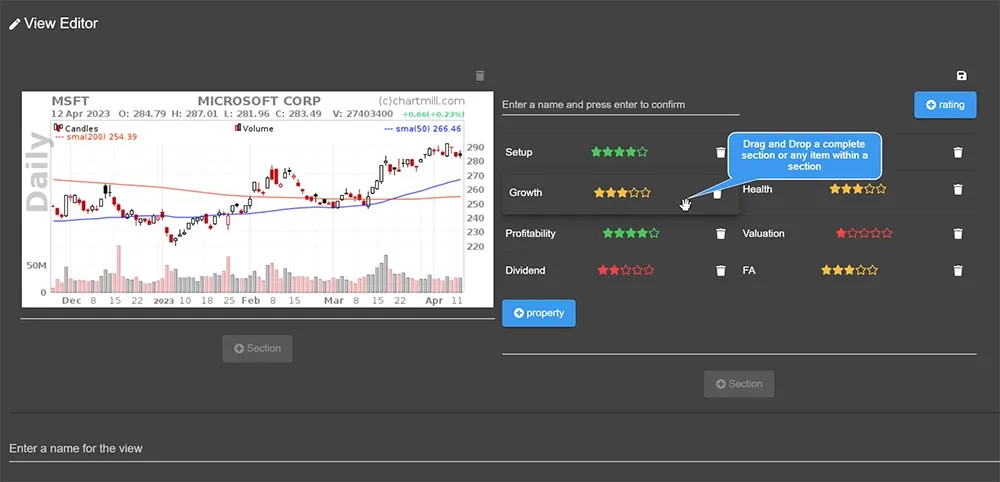
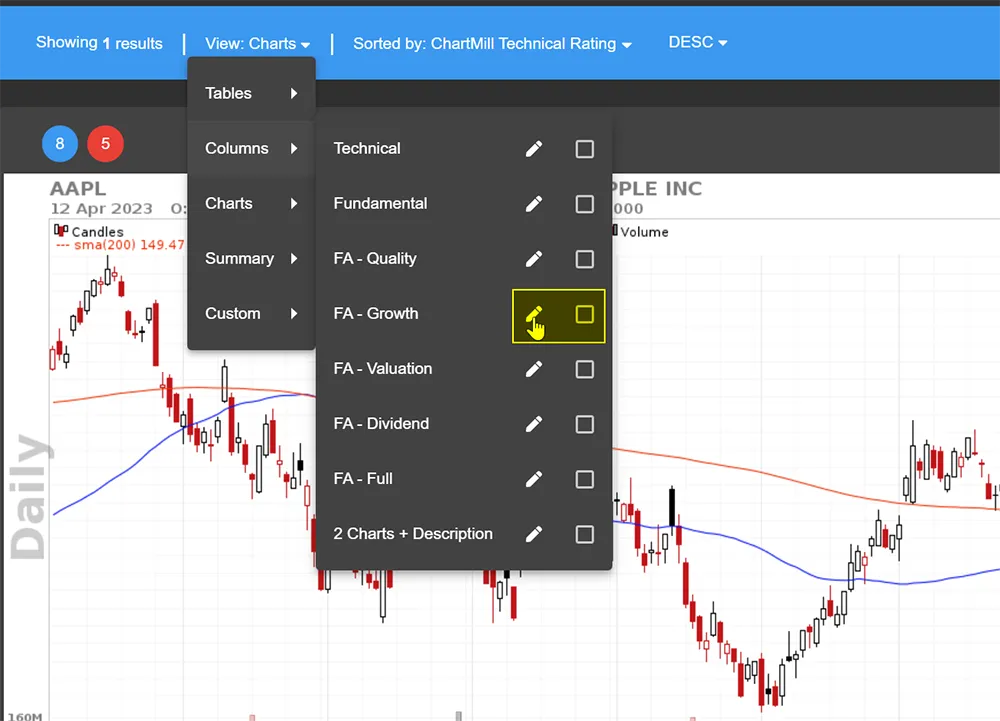
Another change has to do with the predefined custom views. Before this update, it was not possible to change these. If you wanted to make just a small adjustment to these filters, you first had to copy the entire filter via a custom view you created yourself, where you could then adjust/remove/add a specific part or section.
So a lot of work for a small adjustment... But that is now fixed! All predefined views can now be 'tweaked' so that a minor adjustment is done in a few clicks. This can be done by clicking on the pencil icon next to the view.
Click the checkbox next to a view if you want that view to be the default screen for the screen results.
Furthermore, in the main menu, the option to choose a table view, the 2-column or 3-column view is now provided by default.
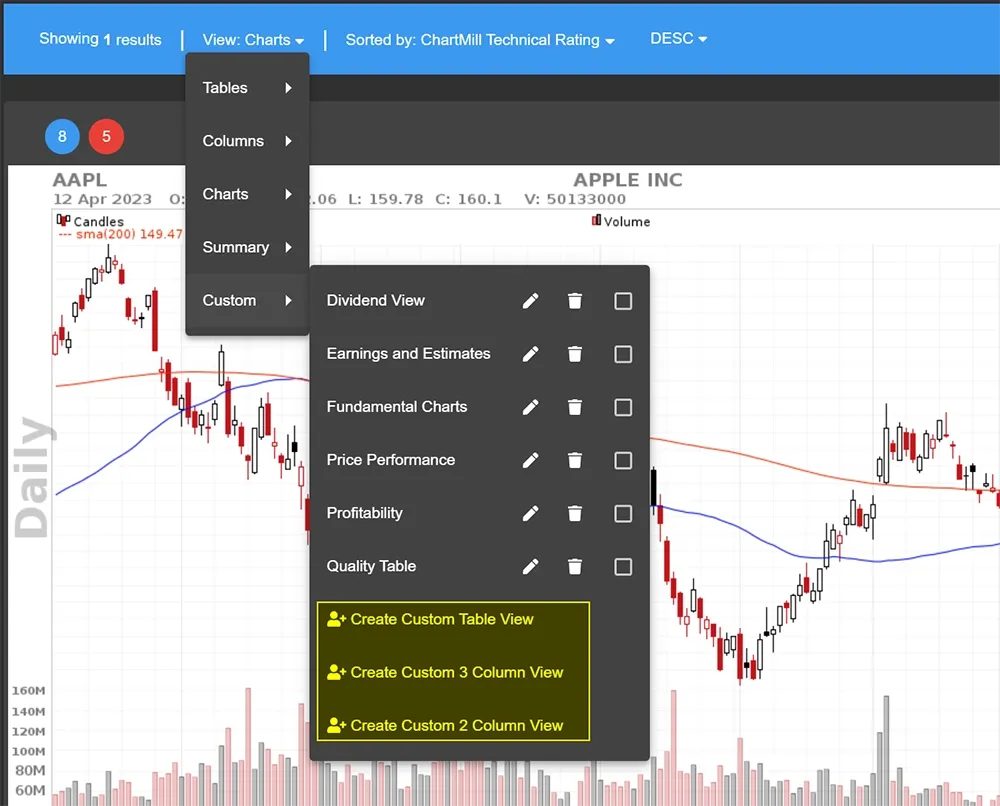
After making your selection, you will enter the view editor where you can quickly and easily select the appropriate parts for each section via a drop-down menu.

Name the created section and save it by pressing the diskette icon. Then create a new section in the same or a different column until you have everything set to your liking.
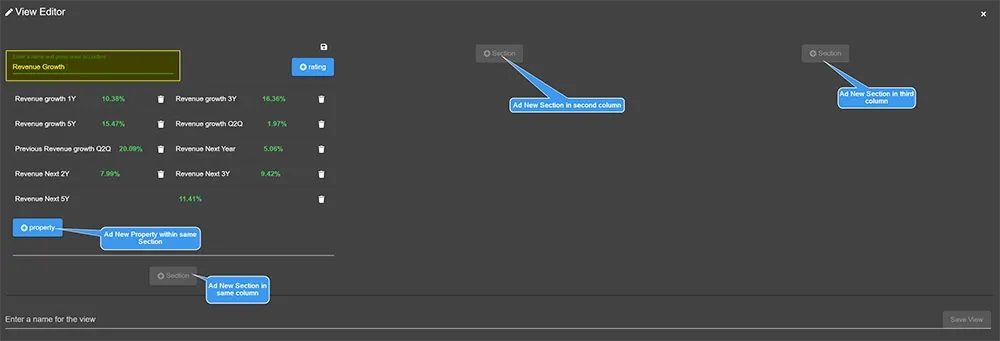
Finally, give it a name and voila, you're ready to use your new view!
